Dedicated Orbital Tracking.
Contents
Tracking capabilities
Several different satellite windows can be opened at the same time. In each window you may display one or more satellite tracks. Adding or removing satellites
from an existing tracking map is always possible. Each window is independent from the others. You can zoom in and out of maps using the ![]()
![]() buttons.
buttons.
How to track satellites
To view a satellite's track a satellite must first be selected. This is done with Satellites| Select active satellite. A Satellites Dialog Box pops up with all the
satellites available in memory. All currently visible satellites will have a * by their name. If there are many satellites (hundreds or thousands) in memory, it might
take too long to calculate if each satellite is visible or not. If this is the case the option Satellites| Quick Satellite select may be used. It will display the satellites in
the database without calculating which ones are currently visible.
After selecting a satellite, it is possible to choose the projection to be used. The 5 available projections are: Mercator, Equidistant cylindrical, Sinusoidal, Hammer, and Orthographic. A text tracking window, with fonts that automatically scale themselves according to the window size, is also available.
Time
The ![]() buttons fast forward and/or rewind time. Each button press will project time forward or backwards. Multiple button presses increase
time amount. To slow down projected time, press the button corresponding to the reverse direction. To pause projected time, press the pause button. To
return to real time, press the play button.
buttons fast forward and/or rewind time. Each button press will project time forward or backwards. Multiple button presses increase
time amount. To slow down projected time, press the button corresponding to the reverse direction. To pause projected time, press the pause button. To
return to real time, press the play button.
You can set a specific time for each satellite window by selecting Satellites| Set new time and date for current window.
Satellite Dish Button
The Satellite Dish ![]() button starts and stops antenna movement if a Kansas City Tracker rotor interface is present. Once activated, tracking of the
appropriate window's primary satellite is initiated.
button starts and stops antenna movement if a Kansas City Tracker rotor interface is present. Once activated, tracking of the
appropriate window's primary satellite is initiated.
Satellite Activation
Each window contains a primary satellite. If several tracks are displayed, clicking on a satellite spot with the left mouse button activates particular satellite and
designates it as the primary satellite. Track highlights and tracking data will change accordingly.
Title Bar
The Tracking Window's title bar contains the name of the satellite being tracked (primary satellite).
Status Box - Status Line
The left portion of the window contains the Status Box. It displays the following:
All information can be displayed in both metric and English formats. See Satellite Preferences Dialog box for more information.
The azimuth and elevation data will appear in green if the satellite is visible, red otherwise. Also shown are the squint angle, the mode, doppler, phase, UMD, eclipse value, solar panel illumination, sun angle, orbit #, solar elevation, and finally the sub-satellite point's latitude and longitude. Note that if the window size isn't big enough to display all of these values, the least important of them will be eliminated. To increase room for maps, less detailed tracking data may be placed on a status line on the lower portion of the windows (again see the Satellite Preferences Dialog box).
Perspective Walk Through
The center of a map projection may be changed. This is accomplished by clicking on any location within the map with your left mouse button. The spot in which
the mouse pointer is located, becomes the map projections new center.
(Make sure you do not have any Auto Tracking functions activated, since they will immediately recenter your satellite's location)
Visual Locational Fix
It is possible to obtain a Visual Locational Fix with LOGSAT. This function gives you Latitude, Longitude and the Locator at the spot in which the mouse
pointer is located. It also includes distance and azimuth from you QTH. All this is obtain by clicking the right mouse button while viewing a map projection.
See also:
This dialog box has several functions. First of all, if the appropriate menu option was used, it will indicate which satellites are visible at the moment by writing them in green and by appending a * by their name. From here the active satellite can be selected. The active satellite is the one most commands of the Satellites menu will work on. From this dialog box the display of satellite tracking windows can also be started.
Single satellite tracking windows
Select one satellite and click on any of the 5 available projection buttons: Mercator, Equidistant cylindrical, Sinusoidal, Hammer, and Orthographic. The map
will appear in the background, allowing you to continue with selections. A text tracking window, with fonts that automatically scale themselves according to the
window size, is also available.
You can also select multiple satellites (press and hold the CONTROL key while selecting with the mouse for multiple choices), and the click on a projection button. Each satellite will be then tracked in a separate window.
If selecting multiple satellites, make sure the Keep satellites on one map check box is not checked.
Multi satellites tracking windows
Make sure the Keep satellites on one map check box is checked. Select the satellites you want to track (press and hold the CONTROL key while selecting with
the mouse for multiple choices), and then click on a projection button. A window with the selected map and containing all the satellite tracks selected will
appear in the background, allowing you to continue with selections.
You can also add one or more satellites to the satellite window that was active last. Just select one or more satellites and hit the Add to map button.
High and Standard definition maps
LOGSAT features two world map databases. The standard definition maps are recommended for 286 and 386 computers without math coprocessor. High
definition maps require more time to be drawn on screen, and thus a high performance PC is strongly recommended. Both high and standard definition maps
can be used at the same time. The quality with which a map will be drawn is controlled by the Use high resolution maps check box. The initial state of this check
box depends on the high def maps settings in the Satellite Preferences Dialog box.
See also:
Satellite Pass Schedules are readouts of when and where a satellite will be visible, over a defined arc of time.
LOGSAT enables you to print out Satellite Pass Schedules to a file, screen, or printer. Mutual satellite passes between two stations can also be calculated.
These calculations occur in the background, so while the printout is being calculated the computer can be used for other purposes. To interrupt a listing just hit the ESCape key. Only one schedule can be printed at a time.
There are 3 types of printouts available.
1 - Detailed data on one satellite for several days.
Orbit # 1589 Illumin= 77.5% Solar Elev= -48.3° Sun Angle= -39.2°
UTC Date Time M Azm Elev Doppler Range Lat Long SQ Phase UMD
22/08/94 02:00 B 319.1° 52.3° -1414 11550 56.2 -15.1 111 18 2.65
22/08/94 03:00 B 269.5° 83.5° -1243 22002 40.5 7.5 70 40 4.03
22/08/94 04:00 B 221.3° 73.4° -875 29783 29.9 3.7 54 62 4.77
22/08/94 05:00 B 226.4° 61.1° -589 35164 22.1 -4.9 44 85 5.16
22/08/94 06:00 B 233.6° 48.7° -348 38614 15.4 -15.1 36 107 5.32
2 - Short-form data on one satellite for several days.
+-------- AOS -------- + -- MAX VISIBILITY -- + ---- LOS ---- +
UTC Date Time Azm | Time Azm Elev | Time Azm | Duration
22/08/94 04:30 27.6° | 04:37 101.4° 25.0° | 04:44 163.9° | 00:14
22/08/94 06:10 3.4° | 06:17 279.0° 38.8° | 06:24 215.8° | 00:14
22/08/94 07:52 334.5° | 07:55 309.4° 3.9° | 07:59 277.1° | 00:07
22/08/94 14:15 80.9° | 14:19 48.3° 3.8° | 14:23 17.1° | 00:08
22/08/94 15:50 143.0° | 15:57 73.6° 38.8° | 16:05 354.2° | 00:15
3 - Short-form data for several satellites for several days.
+---------------- AOS -----------------+MAX EL.+ ---- LOS ---- +
Loc.Date Time | Satellite Azm | Elev. | Time Azm | Duration
22/08/94 00:33 | Mir 306.8° | 36° | 00:44 126.6° | 00:11
22/08/94 02:10 | Mir 277.8° | 21° | 02:18 175.5° | 00:08
22/08/94 04:30 | Noaa 10 27.6° | 25° | 04:44 163.9° | 00:14
22/08/94 06:10 | Noaa 10 3.4° | 27° | 06:24 215.8° | 00:14
22/08/94 07:52 | Noaa 10 334.5° | 13° | 07:59 277.1° | 00:07
22/08/94 14:15 | Noaa 10 80.9° | 17° | 14:23 17.1° | 00:08
22/08/94 15:50 | Noaa 10 143.0° | 51° | 16:05 354.2° | 00:15
22/08/94 17:11 | Mir 203.8° | 33° | 17:21 60.5° | 00:10
The contents of the printout windows can then be saved to a file or printed using File| Save As and File| Print. This is valid for every text window.
See also:
![]() Updating the Keplerian Elements
Updating the Keplerian Elements
LOGSAT's satellite database can be updated using either AMSAT or NASA style kep files. To updated select Satellites| SatelliteElements| Update Keplerian Elements. A window will pop up allowing you to select the file containing the fresh Keplerian data. We suggest updating your keps every 2-4 weeks in order to obtain accurate satellite positions.
The keps for the active satellite can be manually modified by selecting Satellites| SatelliteElements| Edit Keplerian Elements.
To delete satellites select Satellites| SatelliteElements| Delete Satellites. You'll be asked to enter a number of days. This number will be used to automatically preselect all of the satellites with elements older than those many days. To add or remove satellites from the selection press the CONTROL key and select or deselect satellites with the mouse. Some kep files, especially those containing satellite elements for thousands of satellites, include pieces of debris or rocket bodies associated with a satellite launch. They're indicated by appending 'r', 'd' and other letters after the satellite name. LOGSAT can attempt to identify and erase these 'space trash' for you if the Mark debris box is checked.
When updating keps, satellites from the external kep file will replace the ones in LOGSAT's internal database only if they have newer elements. It is also possible to replace satellites in LOGSAT's internal database with satellites from an external file disregarding kep age. This may be desirable for example if you have manually modified the epoch time in LOGSAT's keps. By choosing to Satellites| SatelliteElements| Read Keplerian Elements, all satellites present in the external kep file will replace the ones in LOGSAT's database. This procedure also clears beacon frequency, TX modes and sat attitude for the satellites being read.
LOGSAT is capable of reading kep files in both MSDOS and UNIX file formats. If the kep file has been received via Internet or packet radio, it might contain headers and extra information not related to the Keplerian data itself. These text lines will be automatically ignored by LOGSAT.
The Keplerian Elements are a set of numbers which allows LOGSAT to calculate a satellite's position in space. In order to achieve accuracy these numbers need to be updated regularly. LogSat Software Corporation offers monthly updates on disk.
Orbital Elements and Nomenclature.
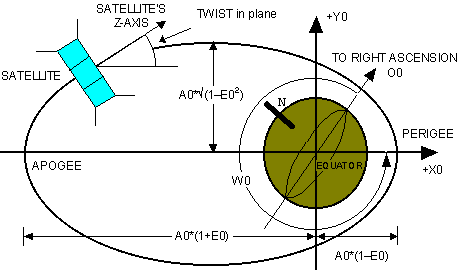
To calculate the squint angle, the satellite's attitude longitude and attitude latitude are needed.
Attitude Longitude - ALON (refer to the picture) Relates the satellite's Z-axis to the orbit's major axis. It is equal to the TWIST angle + 180 degrees.
Attitude Latitude - ALAT If the satellite's Z-axis lies in the plane of the orbit (this page) then ALAT=0, otherwise the Z-axis looks above or below the orbit's plane and ALAT indicates this quantity.
See also:
![]() Updating the Keplerian Elements
Updating the Keplerian Elements
LOGSAT can manage and maintain multiple logs. (For example if you want to separate your contest log from your 'regular' log.)
To start a new log, simply choose Logbook | New, and start adding entries with Logbook| Add Logbook Entry.
Once a call is entered, the program will first of all examine the prefix, checking out which country it belongs to, and then calculates the azimuth and distance from your QTH. It will look through the current log to see if the OM has been connected before. If so, it will tell you when, and will fill in the name and QTH entries. The program can also look through the current log and see if the country has already been contacted. You can choose to disable this feature by selecting Utility| Change Station Elements.
The time and date values will default to the computer's system values. By clicking on the drop down arrow you can also select the values from the last QSO entered. The frequency and operative mode will also default to the last values used. RST and QSL info will default specified by what you entered in Utility| Change Station Elements.
You can also have a map pop up on which you'll see more or less where in the world you are talking to. You can move the mouse in the map and see the latitudes and longitudes of the spot under the mouse, the locator, and the distance and azimuth of that point from your QTH.
If a Kansas City Tracker rotor interface card is present, clicking on the Turn antenna button will point your antenna in the direction of the country being connected.
The file is in a plain ASCII format. To make major changes to your log, such as inserting or deleting QSOs, you will have to open the file as a TEXT file, either using LOGSAT's built in editor (File | Open) or you can use your favorite word processor (Word, Write, etc...). If you have deleted or inserted contacts you will need to rearrange the QSO number fields using Logbook| Renumber Logbook.
See also:
You can search in the callbook for many things: a particular call (ex. IK8SQI), parts of a call (ex. all the calls ending in SQI or the ones having a prefix of IK2), or look for names and addresses, for example to find all the OMs living in your town or with the last name of Smith.
Just enter the string you're looking for and wait... Do not use wildcards (* or ?) in the string. That means that if you're looking for all the calls ending in SQI only the letters SQI must be entered.
Included in the LogSat Professional package is an portion of the italian callbook. The callbook is made up of 3 files, CALLS.DAT, NAMES.DAT and ADDRS.DAT, which contain, respectively, the callsigns, names and addresses of the ham database. These files are in plain ASCII format, and each field is of a fixed length.
Field Length
------------------
Callsign 6
Name 25
Address 45
The various records are contiguous, there are no carriage return or line feed characters to separate them. The first entry in CALLS.DAT refers to the first name in NAMES.DAT and to the first address in ADDRS.DAT. Refer to the provided example files if you wish to create your own callbook database.
See also:
Included in LOGSAT are some antenna and propagation utilities. It is possible, for example, to draw a 3D radiation diagram for any vertical dipole antenna in free space. The isotropic gain and input impedance will also be calculated.
The behavior of a dipole in a certain frequency range can be analyzed. The analysis shows the isotropic gain, input resistance and reactance of the dipole as the frequency changes.
The opposite can also be done, that is keep the frequency fixed and vary the dipole's length to see what happens.
In a radio link between two antennas, the electromagnetic field in any point will be the sum of a direct wave coming straight from the transmitter, and a wave that has 'bounced' on the ground. There will be lows and highs in the resulting field, depending on the height of the two antennas, the distance from the transmitter and the soil characteristics. This effect will be more evident at higher frequencies and higher antenna elevations.
The electric field and attenuation factor along a path between two antennas can be analyzed. The earth can be considered in an imaginary way as flat, or, as the real case, round. The effect of tropospheric refraction can also be considered. The study of low frequency ground waves propagated by diffraction around the earth is also possible.
See also:
By selecting the menu option Antennas| 3D radiation diagram LOGSAT can draw 3D radiation diagrams of vertical dipole antennas radiating in free space. The antenna's isotropic gain and input impedance will also be calculated. The working frequency in MHz, the length in meters of one arm of the dipole, and the dipole's diameter in centimeters must be entered. The inclination of the diagram's Z-axis from the vertical can also be changed. The procedure used to eliminate hidden lines is not perfect, and thus only a wire-frame diagram can also be displayed instead.
If 0 or 90 degrees are entered as Z-axis tilt, then logarithmic circles indicating gain value in dBi will be superimposed on the diagram.
Note that if a vertical radiator over an artificial ground plane (the radials) is used, the length of the vertical radiator should be given, and that the input impedance is actually half of the calculated value.
See also:
By selecting the menu option Antennas| Fixed length variable frequency... LOGSAT can analyze the behavior of a dipole in a certain frequency range. The analysis shows the isotropic gain, input resistance and reactance of the dipole as the frequency changes. This is useful if you want to see how your dipole behaves on other frequencies. For example it can seen that a dipole for the 7MHz (10.6 meters) behaves like a 5/8 antenna on 18MHz, and is also resonant on the middle part of 21MHz. The input data are the two extremes of the frequency range in MHz, the dipole length in meters and it's diameter in centimeters. For the length the same considerations discussed in the 3D Radiation Diagram section apply.
The opposite can also be done, that is keep the frequency fixed and vary the dipole's length to see what happens by selecting the menu option Antennas| Variable length fixed frequency.... If for example you have several dipoles, you can see which one will work best on a certain frequency you don't have a specific antenna for.
See also:
In a radio link between two antennas, the electromagnetic field in any point will be the sum of a direct wave coming straight from the transmitter, and a wave that has bounced off the ground. Ground wave propagation is being considered. There will be lows and highs in the resulting field, depending on the height of the two antennas, the distance from the transmitter and the soil characteristics. This effect will be more evident at higher frequencies and higher antenna elevations.
By selecting the menu option Antennas| Ground wave propagation on ... the electric field and attenuation factor along a path between two antennas can be analyzed. The earth can be considered in an imaginary way as flat, or, as the real case, round. With a flat earth, the two antennas will always see each other; with a round earth at a certain point the antennas will not be in sight due to the earth's curvature, and the electromagnetic field will drop to zero in a certain way. The study of low frequency ground waves propagated by diffraction around the earth is also available.
The working frequency in MHz must be entered, as well as the path range to analyze. If for example the values of the field starting at the transmitting antenna and up to a distance of 400 Km are to be analyzed, enter 0 and 400 as distance range in the dialog window. The heights above sea level in meters of the two antennas and the gain and output power of the transmitting antenna are also needed.
The effect of the troposphere on ground waves can be considered. The troposphere is a region of the atmosphere extending from the surface of the earth up to a height of 8-18 kilometers, depending on the latitude. The most important property of the troposphere is that its temperature decreases with height. This causes the refractive index n of the troposphere to vary. Atmospheric refraction consists in that a ray of light (and, by the same token, radio ray) encounters variations in atmospheric refractive index along its trajectory that cause the ray path to be curved. The excess index of refraction N defined as (n-1)*10^6, n being the refracting index of the troposphere. How much the ray curves depends then on how much N varies with height, dN/dH. A typical value for dN/dH is -4*10¯².
The soil characteristics also take part in this effect. They cause the permittivity and conductivity of the ground to vary. Following is a small table indicating some values.
------------ Sea water Fresh water Moist soil Dry soil Forest Mountains
Permittivity 80 80 10 4 - -
Conductivity 4 10¯³ 10¯² 10¯³ 10¯³ 7.5^-4
See also:
The way the Earth is visualized on flat surface (the screen) is called a projection. There are 5 types of projections available.
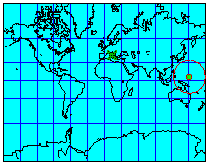 Mercator - The earth's surface is shown as a rectangle, with the meridians as parallel straight lines spaced at equal
intervals and the parallels of latitude as parallel straight lines intersecting the meridians at right angles but spaced further apart
as their distance from the equator increases. Areas on such maps become increasingly distorted towards the poles.
Mercator - The earth's surface is shown as a rectangle, with the meridians as parallel straight lines spaced at equal
intervals and the parallels of latitude as parallel straight lines intersecting the meridians at right angles but spaced further apart
as their distance from the equator increases. Areas on such maps become increasingly distorted towards the poles.
 Equidistant Cylindrical - The earth's surface is shown as a rectangle, with the
meridians and the parallels of latitude as parallel straight lines spaced at equal intervals,
intersecting at right angles. Contours, not areas, on such maps become increasingly
distorted towards the poles.
Equidistant Cylindrical - The earth's surface is shown as a rectangle, with the
meridians and the parallels of latitude as parallel straight lines spaced at equal intervals,
intersecting at right angles. Contours, not areas, on such maps become increasingly
distorted towards the poles.
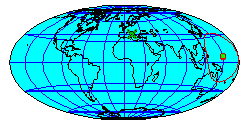 Hammer Projection - The parallels are parallel straight lines and the meridians are
ellipses, the central meridian being a straight line at right angles to the equator, which is equally divided.
Hammer Projection - The parallels are parallel straight lines and the meridians are
ellipses, the central meridian being a straight line at right angles to the equator, which is equally divided.
 Sinusoidal Cylindrical - A picture says a thousand words...
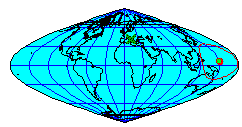
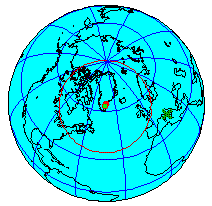 Orthographic - The earth is viewed from
outer space, with the point of vision at an
infinite distance and the rays consequently
parallel. Minimal distortion, but only one
half of the earth is visible at a time...
Orthographic - The earth is viewed from
outer space, with the point of vision at an
infinite distance and the rays consequently
parallel. Minimal distortion, but only one
half of the earth is visible at a time...
Adding tracking stations to maps
Multiple tracking stations may be added to any satellite window by selecting Satellites| Add tracking stations. The new stations may be chosen from the included
world international cities database, by manually entering the latitude and longitude values, or by selecting them directly from a map clicking with the mouse on
the desired spot. Multiple stations may be selected by holding down the CONTROL key while selecting cities from the listbox.
Updating the city database
It is possible to add and remove entries from the world city database. Highlight a location and click on the Erase from database button to remove it from the
database. To add a city the appropriate values for Latitude, Longitude, Height (meters), and location identifier must be entered prior to clicking on the Add to
database button.
Predefined sets of tracking stations
LOGSAT can keep an unlimited number of predefined sets of tracking stations. Included are sets of station used by NASA and CIS (Commonwealth of
Independent States). To select a set of stations all that is needed is to select the desired identifier from the drop down box . All tracking stations belonging to
that set will be automatically selected from the city database.
New sets can easily be created by entering a set identifier in the previously mentioned combo box, and then clicking on the New set button. Locations can be added to the selected set of tracking stations by highlighting the set identifier, selecting the locations from the cities database, and then clicking on the Add to set button. The contents of a set of tracking stations can be cleared with the Clear set button.
Default tracking stations
A constant set of tracking stations that will be used every time a satellite tracking window is opened can be used. This is done by selecting the tracking stations
from the cities listbox, checking the Use current stations as default checkbox, and clicking the OK button.
To revert in having only your home position appear as a tracking station, uncheck this checkbox.
If multiple tracking stations are present on a map, simply move the mouse pointer to the desired station and press the left mouse button to render it active.
Filters may be applied to the satellites displayed in the Satellite Selection Dialog Box. Satellites can be filtered based on their height, range, and acquisition status. Multiple filters can be inserted, and can be combined using the AND or the OR logical operators.
It is possible, for example, to display a listing of all satellites that will enter acquisition within the next 10 minutes and have an height above sea level of less than 1000km. Another possibility would be to display a listing of satellites with either a minimum height of 20000km or a range of over 35000km.
All criteria will be based on the active tracking station in the currently active satellite window, or on your home station if no maps are present on screen.
Calculation time is highly affected by the option that allows the selection of all satellites that will become visible within the specified number of minutes. The greater the number of minutes, the greater the number of computer operations needed to perform this action. Note also that the number of satellites present in the database affects computing time. The ESCape key may be pressed anytime to abort the satellite filtering process.
Set Satellite preferences globally, with "Satellites| Preferences - global" or individually for each window with "Satellites| Preferences - current window only."
In a satellite window, clicking on the button starts and stops antenna movement if a Kansas City Tracker rotor interface is present. The window's primary satellite will be actively tracked. If antenna tracking is on, clicking on another satellite spot will make the antennas turn to the match the new satellite's position.
The TSR rotor driver DRV.COM must be installed in order for the rotor interface to function properly. Refer to your KCT card instructions manual for DRV.COM and KCT card installation.
LOGSAT needs to know the software interrupt vector used to communicate with the rotor driver. This interrupt is usually 63 (hex), unless otherwise specified in the DRV command line options.
You should also indicate whether your antenna is north or south-breaking. (North-breaking means that the antenna goes from 0-360 and the center of the indicator is South; South-Breaking means that the rotator goes from 180, through west to 360, then through east to 180; the middle of the indicator is North).
AMSAT file formats
The following is an example of a satellite's Keplerian elements in an AMSAT style file format:
Satellite: AO-13
Catalog number: 19216
Epoch time: 93281.01224299
Element set: 695
Inclination: 57.8884 deg
RA of node: 290.6961 deg
Eccentricity: 0.7215384
Arg of perigee: 325.7101 deg
Mean anomaly: 4.0040 deg
Mean motion: 2.09725266 rev/day
Decay rate: -1.11e-06 rev/day^2
Epoch rev: 4072
Checksum: 291
NASA file formats
The following is an example of a satellite's Keplerian elements using NASA's 2 line file format:
AO-13
1 19216U 88051B 93358.73417009 -.00000359 00000-0 10000-4 0 8510
2 19216 57.9609 277.2102 7211124 331.1032 3.3836 2.09723023 42354
Decode 2-line elesets with the following key:
1 AAAAAU 00 0 0 BBBBB.BBBBBBBB .CCCCCCCC 00000-0 00000-0 0 DDDZ
2 AAAAA EEE.EEEE FFF.FFFF GGGGGGG HHH.HHHH III.IIII JJ.JJJJJJJJKKKKKZ
key: A-CatalogNum B-EpochTime C-Decay D-ElSetNum E-Inclination F-RAAN
G-Eccentricity H-ArgPerigee I-MeanAnomaly J-MeanMotion K-OrbitNum Z-Checksum